• Home
  • About
  • Work
  • Contact
Camila Rinaldi
  • Home
  • About
  • Work
  • Contact

Addicted to cookies

I noticed that most of my blog posts are about sweets. Which is funny because I don’t consider myself inclined to sweet treats more than I do for savory food. Ok, maybe lately I’ve been a little addicted to sugar and I know why (hello adult life). But in general I prefer savory and that’s why I chose to become a chef and not a pastry chef.

For the last two months I’ve been craving cookies all the time. Not chocolate, not even Nutella. Cookies. Also not the healthy type of cookies, chocolate chip ones. I’ve tried many of them: Whole Foods brand, Amazon Fresh brand, Pepperidge Farm’ Sausalito is one of my favorites but I try to avoid ultra-processed foods (even though my all time favorite is Annie’s Chocolate Chip Cookie Bites and Trader Joe’s Way More Chocolate Chips).

I saved half the dough to bake another time. Best. Decision. Ever.

I saved half the dough to bake another time. Best. Decision. Ever.


Then I saw Emily Schuman posting on Instagram a recipe for Peanut Butter Cookies and this one had chocolate chip. My heart was racing. Emily always seems to find the best recipes and that’s one of the reasons why she’s the only influencer I follow. She already convinced me to buy a new deodorant and kind often she encourages me to get up and move on (like go on a walk or even tidy up the house).

Turns out the recipe is from another influencer that I follow and admire: Deb Perelman from Smitten Kitchen. Deb is the “mother who loves to cook” that I never had. Growing up my mom used to make amazing food, I really loved everything she did but she never liked the art, she used to say that it wasn’t for her. So my mom never invested time in teaching me how to cook and to learn new recipes, she stuck with the basics she knew: rice, beans, protein and very simple salads (usually lettuce, tomato, onions and carrots).

Going back to my cookie addiction, as you know by now I’m not very into pastry as an art for myself. I admire it so so much but having to follow the exact rules turns me off a little bit. But since I started working in a professional kitchen I noticed that uhmmm yes, I have to follow recipes. In the restaurant I measure everything. Restaurants needs to be consistent and there’s always someone different making the dish so we have to follow a guideline for the flavor. And now I’m becoming a little more comfortable with baking since following directions became part of my routine.


Chocolate Chip Peanut Butter Cookies - influenced by an influencer that got the recipe from another influencer that got the inspiration from a bakery that used to be a hit a few years ago.

Chocolate Chip Peanut Butter Cookies - influenced by an influencer that got the recipe from another influencer that got the inspiration from a bakery that used to be a hit a few years ago.

Now on my days off I anticipate baking. It has become a project for me. And I noticed that I’m good at it (I just follow instructions duuuh). At this moment instead of buying cookies I’m making them. I don’t have a stand mixer at the moment (RIP my beautiful red Kitchen Aid that my friend found on her building trash) or a food processor (this one broke too). But nothing has stopped me so far (just some laziness to be honest). Thanks to this currently pandemic (coronavirus) I’m looking forward to more baking into my life. And home baked cookies.


tags: coronavirus, cookies, cook at home, chocolate chip peanut butter cookies, pastry, baking
categories: Dessert
Monday 03.16.20
Posted by Camila Rinaldi
 

I am a sucker for banana bread

IMG_9805.jpg

Definitely this title defines me. Even tough banana bread is not my favorite cake of all time I think it’s the most versatile recipe in the baking area. It’s super simples: you basically need overripe bananas and it seems my family can never get through the whole bunch so we always have “sad bananas” around, just waiting to be baked with whatever I’m in the mood of: chocolate chips, walnuts, hazelnut, almond flour, yogurt, maple syrup, coconut sugar, etc.

After seeing Raiza Costa’s Stories on Instagram this week it got me craving for banana bread. Unfortunately her recipe takes butter and I was feeling lazy for that - to wait it reach room temperature and just pull my stand mixer seemed a lot of work for an easy cake. But there’s one thing she adds to a few of her cake recipes that makes all the difference: yogurt. It makes the cake SUPER moist. It’s pure chemistry: the baking soda reacts with the yogurt acidity and as a result produce the gas that enlarges a batter's bubbles. I had to look for it because chemistry definitely is not a strength of mine. All I know is that works!

IMG_9806.jpg

After a little research I decided to try a recipe of my own and now I have the perfect Chocolate Chip and Walnuts Banana Bread recipe to share. Of course you can either omit the chocolate chip and walnuts part or just swap for something that you like better. My suggestions includes chopped dates, peanuts, hazelnuts and even blueberries or raisins (if you are into it).

CHOCOLATE CHIP AND WALNUTS BANANA BREAD

INGREDIENTS

  • 3 eggs

  • 1/2 cup canola oil

  • 1/3 cup maple syrup

  • 1/4 cup Greek yogurt

  • 1/4 cup oat milk (or any other kind of milk)

  • 1 teaspoon vanilla extract

  • 4 mashed ripe bananas (do not over mash it)

  • 1 3/4 cups all purpose flour

  • ½ teaspoon ground cinnamon (optional)

  • 1 teaspoon baking soda

  • ½ teaspoon salt

  • 1 cup dark chocolate chips (optional)

  • ½ cup chopped walnuts (optional)

INSTRUCTIONS

Start by pre-heating the oven to 325F and grease loaf pan (butter, ghee, canola oil - whatever you want) and set aside. Start by mixing the dry ingredients in a medium bowl: flour, cinnamon, baking soda and salt. In a larger bowl beat the eggs, then add the oil, followed by the maple syrup, yogurt, milk and vanilla. Add the mashed bananas. Beat all the ingredients until all mixed, about 2 minutes. Slowly start to incorporate the dry mixture through a mesh strainer. Always with delicate movements. Lastly incorporate the toppings such as the chocolate and walnuts. Pour the batter into the pan and bake for 55 minutes to 1 hour, or until the cake tester (or toothpick) comes out clean.


tags: banana bread, banana, cake, chocolate chip, walnuts, sugar free
categories: What I Ate Today
Friday 06.14.19
Posted by Camila Rinaldi
Comments: 2
 

I have a sweet tooth

When I moved to NYC about 3 years ago I was basically alone. Of course I had my husband and our little dog to be with but I had no friends, no family. Also we stayed at this Airbnb for about 3 weeks until we finally moved to our first apartment.

9B488FB7-C276-43A8-ADFA-5BB6B9A6B015.jpg

In this beginning I had just a few things to lean on during my time: buying stuff for my new apartment and the internet. I came to NYC with no job and no career - my deepest desire was to change from advertising from something else, something related to food. So I started to follow Bon Appétit on Youtube. From the first video that I saw I loved the content. Also it taught me so much - from full recipes to techniques.

Still nowadays I count on BA’s recipes. It’s the first website that I check whenever I want to find out about a new recipe or if I have an ingredient which I’m in doubt of how to prepare - for techniques or just creativity.

C009A744-D623-49E1-B514-EBBB2A839857.JPG

Recently I acknowledge the fact that I have a sweet tooth. Between breakfast and lunch I crave something sweet. And very often between lunch and dinner I have the same cravings. Usually I rely on my favorite combo: banana and peanut butter, sometimes I add some chocolate chips, maple syrup and/or chopped hazelnuts. But I was getting tired of eating the same thing over and over again. So I would munch on chocolate! (Lindt is my favorite).

I know that people really like chia pudding. I tried a few recipes but didn’t like any of it. I believe the texture is what it makes that not so tasty for me. It comes as a surprise for me that I have this issues because I always had zero problems with texture.

Until on the beginning of this year I founded out this Molly Baz recipe for Chocolate-Cashew Chia Pudding. She blends lots of ingredients and then add the chia pudding. But since I was already using the blender I thought “why not blend the seeds with it?”. It was the best decision I had. The texture was super creamy and after some hours on the fridge it got even better.

89405869-E9D1-451E-A840-D0EBA8B889CA.JPG

Now I have a quart container on my fridge every week, just one step away from me to dive into it and have a healthy and delicious snack. It’s a good breakfast too if you are into sweet treats on your mornings - I’m not, I gotta have savory stuff for breakfast with a big cup of coffee and you guess… cashew milk!

For my chia pudding I like to add vanilla whey protein and chopped fruits on top. The combination of vanilla and chocolate really makes me happy. And adding strawberries almost makes me feel like I’m having Neapolitan ice cream. Other combinations that I like are hazelnuts with banana and coconut chips with blueberries. Just yummy!


tags: sweet tooth, sweet treat, chia pudding, dessert, healthy, vegan, paleo, gluten free
categories: What I Ate Today
Wednesday 04.03.19
Posted by Camila Rinaldi
 

Classic Banana Muffin

498557BC-E65F-475F-973A-8BAEA735792A.jpg

Ok, so I just checked and my last blog post was almost a year ago and the subject was… bananas. You can say that I’m kind of crazy for bananas and the truth is that I really am. It’s definitely my favorite fruit and also so versatile both for eating - just peel it!- and making recipes - cake, muffins, pancakes, bread, with peanut butter, hazelnut, maple syrup, chocolate chips, walnuts, in smoothies, pudding, just mashed… OMG I can go on and on here.

By now you already now that I always have bananas on my counter and that some of them sometimes turn black because I don’t eat a banana a day. Sometimes I’m not in the mood or I simply forget to eat a fruit a day.  Because of that I have to come up with ideas to not throw the food out. Speaking of that this is my mais goal for this new year. I know I started this blog because I wanted to post #zerowaste recipes and to show people that with a little bit of effort you can make the most of the food you have available. For 2019 I want to go deep into this line of thought, not only because I’m concerned with the environment (which I am), but also I’m realizing that this good for my bank account as well. Actually there’s only PROS when you talk about zero food waste, right?

9A311781-1568-4AD4-96E1-96375B08919E.jpg

I really like banana muffins and one day out of nowhere my husband asked me to do some. I started to do some research to find an easy recipe but also a delicious one. I knew I wanted something simple, that I could do in about 20 minutes on a weekend morning and I came across this recipe from Taste of Home. Of course I have added my personal touch, specially when I realized that the batter wasn’t what I expected in the beginning. I wanted higher muffins as well so instead of just mixing the egg I separated the white from the yolk, actually the whites from the yolks, because on my recipe there’s 2 eggs instead of one. Also I added some chopped walnuts because I love the crunchy aspect of a banana muffin.

Here’s my recipe. Let me know if you do something different for your banana muffins or if you have a recipe of your own. I know that for now I’m sticking with this one calling it a family classic already.

CLASSIC BANANA MUFFIN

INGREDIENTS

  • 1 1/2 cups all-purpose flour

  • 1 cup sugar

  • 1 teaspoon baking powder

  • 1/2 teaspoon salt

  • 3 medium ripe bananas

  • 2 large eggs at room temperature

  • 1/3 cup vegetable oil

  • 1/2 cup chopped walnuts

INSTRUCTIONS

Pre-heat the oven at 375º. Sift and combine all dry ingredients in a medium bowl. Separate the egg yolks from the whites. In a large bowl smash the bananas and mix it with the egg yolks and oil. In a separated bowl whisk the egg whites until firm peaks - you can use a stand mixer, a speed hand blender with the whisk accessory or whisk it by hand. Mix the dried ingredients with the banana mix. If it’s too heavy you can start adding the whites already. Slowly fold the egg whites into the batter. When your batter is ready start slowly mixing the chopped walnuts. Transfer the batter to a muffin tray, lined with muffin parchment paper. Baked for 22 minutes (it can also be done between 18 to 25 minutes - it all depends on your oven) or until a toothpick inserted in the center comes out clean. Cool for 10 minutes then remove from pan and place in a wire rack to cool completely.

TIP: You can also add some cinnamon on your batter or even mix cinnamon with sugar and sprinkle on top to create a nice crust on your muffin.

TIP 2: if you notice the walnuts start to burn too much on the top of the muffin, move it to the lower rack on the oven.

tags: banana, banana bread, banana muffin, traditional banana muffin recipe, zero wast, no waste
categories: Zero Waste
Sunday 01.13.19
Posted by Camila Rinaldi
 

Flourless Double Chocolate Banana Bread

When I go chocolate chip I really go for it!

When I go chocolate chip I really go for it!

Instagram inspires me so much. I think that it's so nice to have a place where you can follow people that are doing very different things all around the world. Or even people that are interested in the same subject as you are.

This week I got so inspired by Garden In The Kitchen. Not only the author, Silvia, is a Brazilian living in the USA just like me, but she's so inspiring. What I really like about her is that she does wholesome recipes and very nutritional ones, but also very flavorful. 

When I saw this double chocolate banana bread on her feed I knew that I had to try it. Since I had scheduled a tea time with one of my best friends that was the perfect opportunity. But my friend can't have gluten, so I had to do a few changes. And that's what I like - we can totally get inspired by something and not follow that through exactly how it is. I love that we can change recipes and create another one just by getting inspired.

B565CB13-EBFD-4FB6-920D-02175CAEA2A6.JPG

Just like Silvia's recipe mine use only a blender. Luck for me I have a very potent one. If this is not your case, don't worry. You can blend the soft ingredients on the blender and then mix it in a bowl with the dry ones. Easy peasy. If you are looking for a vegan option, go for Silvia's, mine takes egg - since I had to found a solution for the oats in hers, I used almond flour. Also she used almond butter and I am pretty sure I didn't even need the peanut butter for mine since I used the eggs - probably you can add an extra egg if you don't want or don't have peanut butter around. 

FLOURLESS DOUBLE CHOCOLATE BANANA BREAD

INGREDIENTS

  • 2 cups almond flour
  • 4 small ripe bananas (or 2 large)
  • 2 eggs
  • ¼ cup maple syrup
  • 1 tsp baking soda
  • 2 tbsp cacao powder
  • ½ cup chocolate chips
  • ¼ cup peanut butter
  • Pinch of salt and cinnamon to taste

INSTRUCTIONS

Pre heat the oven at 350F (180º C). Grease a loaf pan with canola oil or place a parchment paper. On the blender mix all the ingredients, except the chocolate chips. You can also start by mixing the bananas, maple syrup, eggs and peanut butter and then add this mix to the dry ingredients in a separate bowl. Place the batter in the pan and bring to the oven for 50 minutes or until you place a toothpick in the center of it and it comes clean. 

Enjoy!

Enjoy!

tags: flourless banana bread, gluten free, chocolate, cake, dessert, recipe, food
categories: Dessert
Friday 03.02.18
Posted by Camila Rinaldi
 

Gluten Free Carrot Bread

I don't like to be radical when it comes to food. I love the "food" subject and what I really like is to do research. I mean, I was vegetarian for 8 years of my life. Vegan for 6 months. But since I decided to join the food area I had the decision that I had to experiment everything - even things that I don't like and I THINK doesn't look (or taste) good. I HAVE TO TRY IT ALL.

That's nothing is off the table for me. Also I now that there are people with health problem everywhere: lactose intolerants, celiacs, fructose intolerant, allergies, etc. Besides people who can't REALLY consume some kinds of food, there are those people who doesn't want to consume certain foods.

To be honest I don't do diets. Sometimes I really go easy on carbs and sugar, for example, to lose some pounds (I try to go ease on these things in general, but you know, everybody has those days, right?). That's why I follow vegan, whole30, ketogenic, gluten free profiles and other kinds of diets on Instagram - I like to know it all! Mainly because if a friend has some restriction I can deal with it when he or she comes to my house. I remember my vegetarian days when my family where really lost whenever I went to their place because they didn't know what to do for me (here's a tip: you can NEVER go wrong with French fries for a vegetarian/vegan person).

So one day I was wandering by Instagram when I found this woman profile. Gisela's so athletic, she exercises everyday, she eats so clean and well. I was mesmerized. Also because she's gorgeous and so fashion. Sometimes she posts pictures of her meals and the recipes, that's where I saw the basic recipe of this bread. She says she bakes it on a muffin tray, but I prefer to use a loaf pan, just because it looks like bread!

Yeah, there's a piece on the top missing - I couldn't wait!

Yeah, there's a piece on the top missing - I couldn't wait!

Just a reminder: you don't need to be fitness to try "fitness food". Let go of the labels, it's just food. Here's one thing that you should pay attention: you should eat REAL FOOD. And the only label you should my is the one on the package - if you can't say the name of the ingredient or doesn't recognize it, you should think twice before consuming it. Simple, huh? So let's check the recipe:

GLUTEN FREE CARROT BREAD

INGREDIENTS

  • 2 eggs
  • 2 cups almond flour
  • 2  medium carrots
  • 2 tbsp ghee
  • 1 tsp baking powder
  • 1 tsp salt
  • 1/2 tsp black pepper
  • 1/2 tsp turmeric (optional)
  • 1/2 tsp thyme (optional)
  • 1/2 tsp dried oregano (optional)
  • 1 tsp chia seeds (optional)
  • 1 tsp poppy seeds (optional)
  • olive oil to grease the loaf pan

INSTRUCTIONS

Pre heat the oven at 350F (180º C). Grease the loaf pan with olive oil. On the blender mix the eggs, carrot, ghee, salt and pepper. Then add the optional seasoning - turmeric, thyme, dried oregano and chia seeds. On a bowl put the almond flour, baking powder and poppy seeds. Pour the liquid in the bowl with the dry ingredients and mix until combined. Transfer to the loaf pan and bake for 80 minutes or until a stick comes out clean of it. Let it cool on the pan and storage on the fridge.

6485BAC3-DFD5-4C10-A9A6-53FBCF20E523.JPG

Disclaimer: the spices on the recipe are optional. If you want to add other things instead, go for it. My suggestion: basil, flaxseeds, cayenne pepper, sumac, Parmesan cheese, sesame seeds, chili pepper flakes, etc. It's made with almond flour, so it's not nut free :(

Now here's how I am loving to have it: I put two small slices on the fridge and let it TOAST (got it?) for a few minutes. Then I add a poached egg on top and sprinkle some "everything but the bagel" Trader Joe's seasoning. On the side there's mashed avocado with a splash of lime, salt and cayenne pepper, topped with feta cheese. And a cup of coffee and almond milk ❤.

Breakfast time with TOAST Food!

Breakfast time with TOAST Food!

Tuesday 01.09.18
Posted by Camila Rinaldi
 

Spicy Hot Cocoa

Happy 2018! As I am writing this just there's this massive amount of snow falling, or as they call it: BOMB CYCLONE.

I remember my first snow storm in NYC. It was 2010 and I was just a tourist having vacation in town. Me and my boyfriend, now husband, went out to get the most of the town and to see the snow. As soon as we got to Union Square everything was so white that I thought that I was going blind just like José Saramago's book Blindness. We went to this restaurant over there  called The Coffee Shop and I got so surprised because I saw Brazilian things on the menu. I was probably on my final days of vacation and a bit homesick for sure, so I reached for the most Brazilian soft drink ever: Guaraná. A very sweet soda made of the guaraná fruit.

After the restaurant we basically just crossed Union Square to go to Starbucks. Back in the day I wasn't a big fan of coffee so hot cocoa was my choice. Since then every time that there's snow I feel like having hot cocoa. But of course my choice now goes for a more rich in flavor and healthier version.

Spicy Hot Cocoa - why not?

Spicy Hot Cocoa - why not?

I had bought a bag of xylitol - a natural alternative to sugar. It has 40% less calories than sugar and it's basically a sugar alcohol (polyalcohol), and I wanted to try the thing. So here was my opportunity. Also instead of milk I decided to go with the almond version - after going to a summit about food and health I decided to take a break from regular milk on a daily basis. Turns out almond milk is so delicious that I don't even miss the other one (I always go for the unsweetened vanilla version). 

For this hot cocoa I wanted it hotter, spicy! I have a pantry full of spices and wanted to be bold about this recipe. I saw a spicy hot cocoa at a menu in some coffee shop and this idea stayed with me until I went to kitchen and decided to do my own version. This time I reached for the black Urfa chili from Burlap & Barrel. It has this malty flavor that pairs so well with chocolate. 

7509AFA8-ADC1-497E-91C5-4271988A4899.JPG

Other ingredient used on this recipe is arrowroot powder. I needed a thickening element to give that creamy texture to my hot cocoa. I wanted it to be gluten free so no wheat flour, of course. You may think about corn starch, but I wanted something more delicate not only when it's hot but when it's cold as well. I wanted to be able to put the leftovers on the fridge and maybe eat by the spoon when a sugar craving appeared. Arrowroot has this power because it doesn't break down when cold. Bonus points to arrowroot!

Without further ado here's is the recipe:

SPICY HOT COCOA

INGREDIENTS

  • 2 cups almond milk
  • 2 tbsp cocoa powder
  • 2 tsp arrowroot
  • 2 tbsp xylitol
  • 65 grams 70% chocolate
  • Black Urfa chili to taste

INSTRUCTIONS

Pass the 70% chocolate by the food processor or grater and mix with all dry ingredients - except the chili. Reserve. In a pan pour the almond milk and bring it to a simmer. Put it in the low heat and add the mixed dry ingredients and mix it with a whisk until everything combined and very smooth. Add the chili in the end to taste. 

A9CF8D98-4B61-443F-A71A-48380F85E555.JPG

Super easy, super delicious! It's ready in 5 minutes or so. Also you can substitute the almond milk for other one, even the regular milk. Instead of xylitol you can use regular sugar, coconut sugar, stevia or other kind or sweetener that you prefer! And if you don't have arrowroot go for corn starch, no problem at all!

Follow me on Instagram @toasfood:

I never liked to work out. I hate sweating and I feel weak bc I’m never able to follow the instructor (repetitions, balance, intensity). But I’ve been learning to respect my body limits and to pay attention. Also it’s been great to
For the first time in my life my thumb is looking greener. Maybe I finally learned how to give love to my plants. 📸 @warnerjesse
Welcome to my office. 📸 @warnerjesse
Cheffin’ it up. 📷 @warnerjesse
Home RSS
tags: hot cocoa, spicy hot cocoa, burlap and barrel, spices, chocolate quente, nyc
categories: What I Ate Today
Thursday 01.04.18
Posted by Camila Rinaldi
 

Cardamom Creme Caramel

It's not vanilla: the little black dots are yellow cardamom seeds.

It's not vanilla: the little black dots are yellow cardamom seeds.

I am that type of person that goes to bed and start to think. A lot! Somedays I start to think about food and flavors and new combinations and my mind goes crazy. Sometimes I just sleep and kind of forget it - because I am not the type that will open my eyes, take the cell and make a note because this will make me lose my sleep for sure. But somedays I am look enough to go to bed with an idea on my mind and then I wake up and the idea is there I will only rest when I go to the kitchen and start to test.

This happened this week when I was thinking about creme caramel, one of my favorite desserts ever. Creme caramel is very popular in Brazil, I grew up having it on special occasions with family. But it's the kind of dessert that people love and it's not so simple to do. Specially because sometimes it gets some holes in it and some people love this way but I prefer de creamier one - no holes, just a velvety cream.

A few months ago I was giving this amazing yellow cardamom by Burlap & Barrel and felt in love by it. It was the first time that I had cardamom in my life. Don't get me wrong but cardamom is so expensive in my country that I never had the chance to try it before. Since then I've been trying to use it as many times as possible with different combinations. And the latest one is the subject of this post.

Sweet and glorious with a fragrant taste.

Sweet and glorious with a fragrant taste.

It's so hard to do a dessert like this when the sun is already down and you have to wait until the other day just to take nice pictures. Nevertheless so worthy. Do you want the recipe? Here it is:

CARDAMOM CREME CARAMEL

INGREDIENTS FOR THE CARAMEL

  • 2 cups sugar
  • ¾ cup water

INSTRUCTIONS

In a pan add the sugar and the water and give it a little stir to dissolve. Turn on the medium low heat and once the mixture comes to a boil, stop stirring and wait until it turns to caramel. Transfer to a 9 inches pan.

INGREDIENTS FOR THE CREME

  • 4 eggs
  • 1 can of sweet condensed milk
  • 2 cups heavy cream
  • 10 pods of yellow cardamom

INSTRUCTIONS

Preheat the oven at 350 F. Put some water to boil. Take the seeds out of the cardamom pods and add in a blender with all the other ingredients. Blend for about 2 minutes. Using a sieve transfer the liquid to the pan with the caramel. Use foil to cover it. Get a bigger pan and place the pan with the liquid on the center of it. Put in the oven and pour the hot water. Let it cook for 90 minutes. Take the pan out of the oven and let it cool on the counter. Put in the fridge after it has cooled down. Leave it on the fridge for at least 3 hours.

To take the creme caramel out of the pan: use a knife to let it out from the edges from the pan. Put the pan on the stove top for about 20 seconds. Place a beautiful plate on top of the pan and turn. It's ready!

Ready to be devoured! 

Ready to be devoured! 

I would truly recommend this dessert for Christmas feast! Also I would decorate it with orange confit or toasted pistachios. Superb!

tags: creme caramel, cardamom, yellow cardamom, burlap & barrel, dessert
categories: Dessert
Sunday 12.10.17
Posted by Camila Rinaldi
 

Falling for Pumpkins (and Squashes)

When I moved to USA I was shocked when the fall season arrived. Everything was pumpkin. Pumpkin everywhere. I couldn't understand the pumpkin obsession. I hated pumpkins and squashes. In my country we have a few types of the vegetable and some very traditional recipes using it, but to be honest I never had them. The few times that I had squash at home I hated it.

I've been thinking about all the things that I (used to) hate about food. Gladly I've been changing it gradually. When I was a kid my mom tried to feed me sometimes with healthy food, and I used to hated it with all my body. I don't blame her. When she was a kid she didn't have access to sweet treats, frozen meals or fast food - everything was too expansive or it wasn't created yet. 

Growing up in the 90's made me a kid that loved instant ramen, hot dogs, French fries, all kinds of fast food, cookies from packages and potato chips. Plus all the soda I could have. My mom knew how to cook and even tough she didn't like this chore sometimes she was very creative about it. But most of the times she was pretty basic. Until we had internet. I have memories of her printing recipes to do for Sunday lunch. Back in the time healthiness wasn't a concern for the world - no tips of how to hide vegetables into delicious recipes. Times have changed! 

Last year I decided to buy a pumpkin and do something with it. I went to Union Square Farmer's Market and bought a Kabocha. I almost lost some fingers trying to open it. And it was SO big! I did a soup full of bacon - you can't go wrong with plenty of bacon, right? Also I added a very generous amount of liquid smoke. I really like the smokey taste.

Unfortunately I had to throw a lot of squash away since it was on my fridge so for long and I wasn't so sure about the taste of it. But now the good part: I am more conscious about my shopping habits and I didn't;t buy a big squash. This year I started with the Delicata squash. I bought, had no idea of what to do with it until a good friend gave me this very easy t do idea: roast it until very tender and do a spinach and blue cheese cream to put on top. I had some leftovers smoked sausages from another meal and added them on it as well. Check the final result here and follow me on Instagram!

I really liked the flavor of this squash so I decided to buy it again. And today I felt it was the day. Nothing much again. Just roasted with olive oil and salt and pureed. See the dish here.

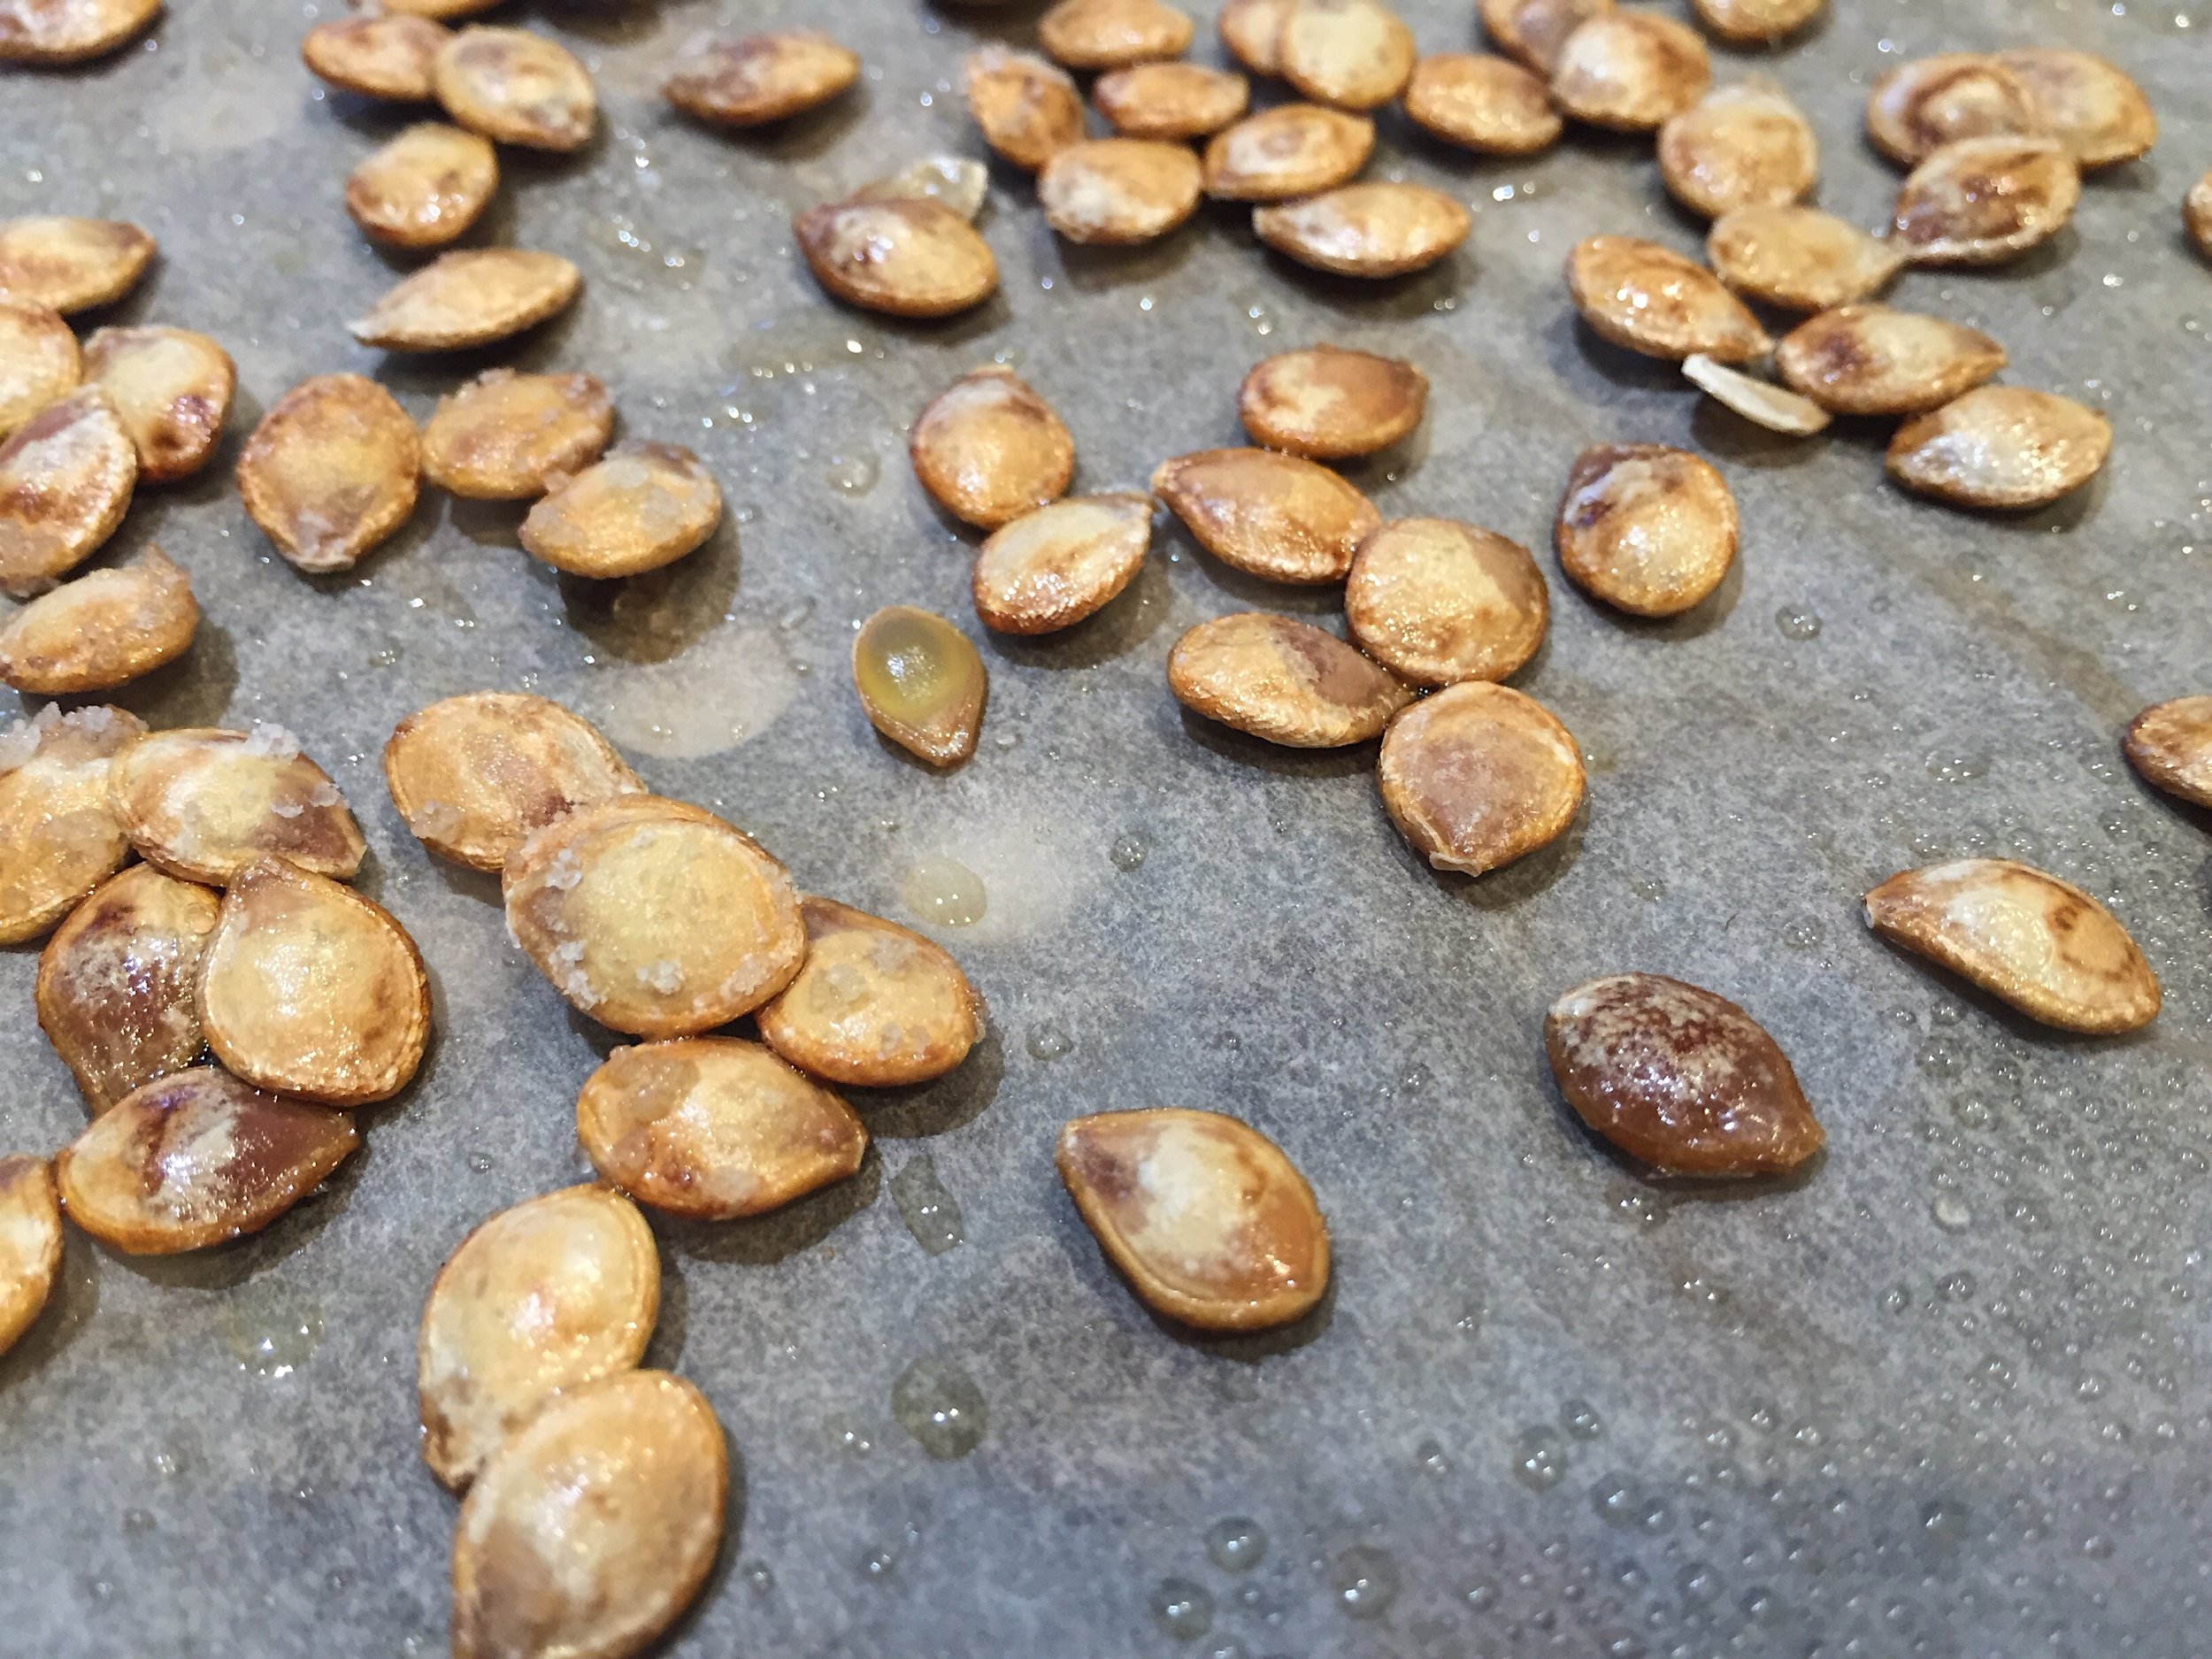
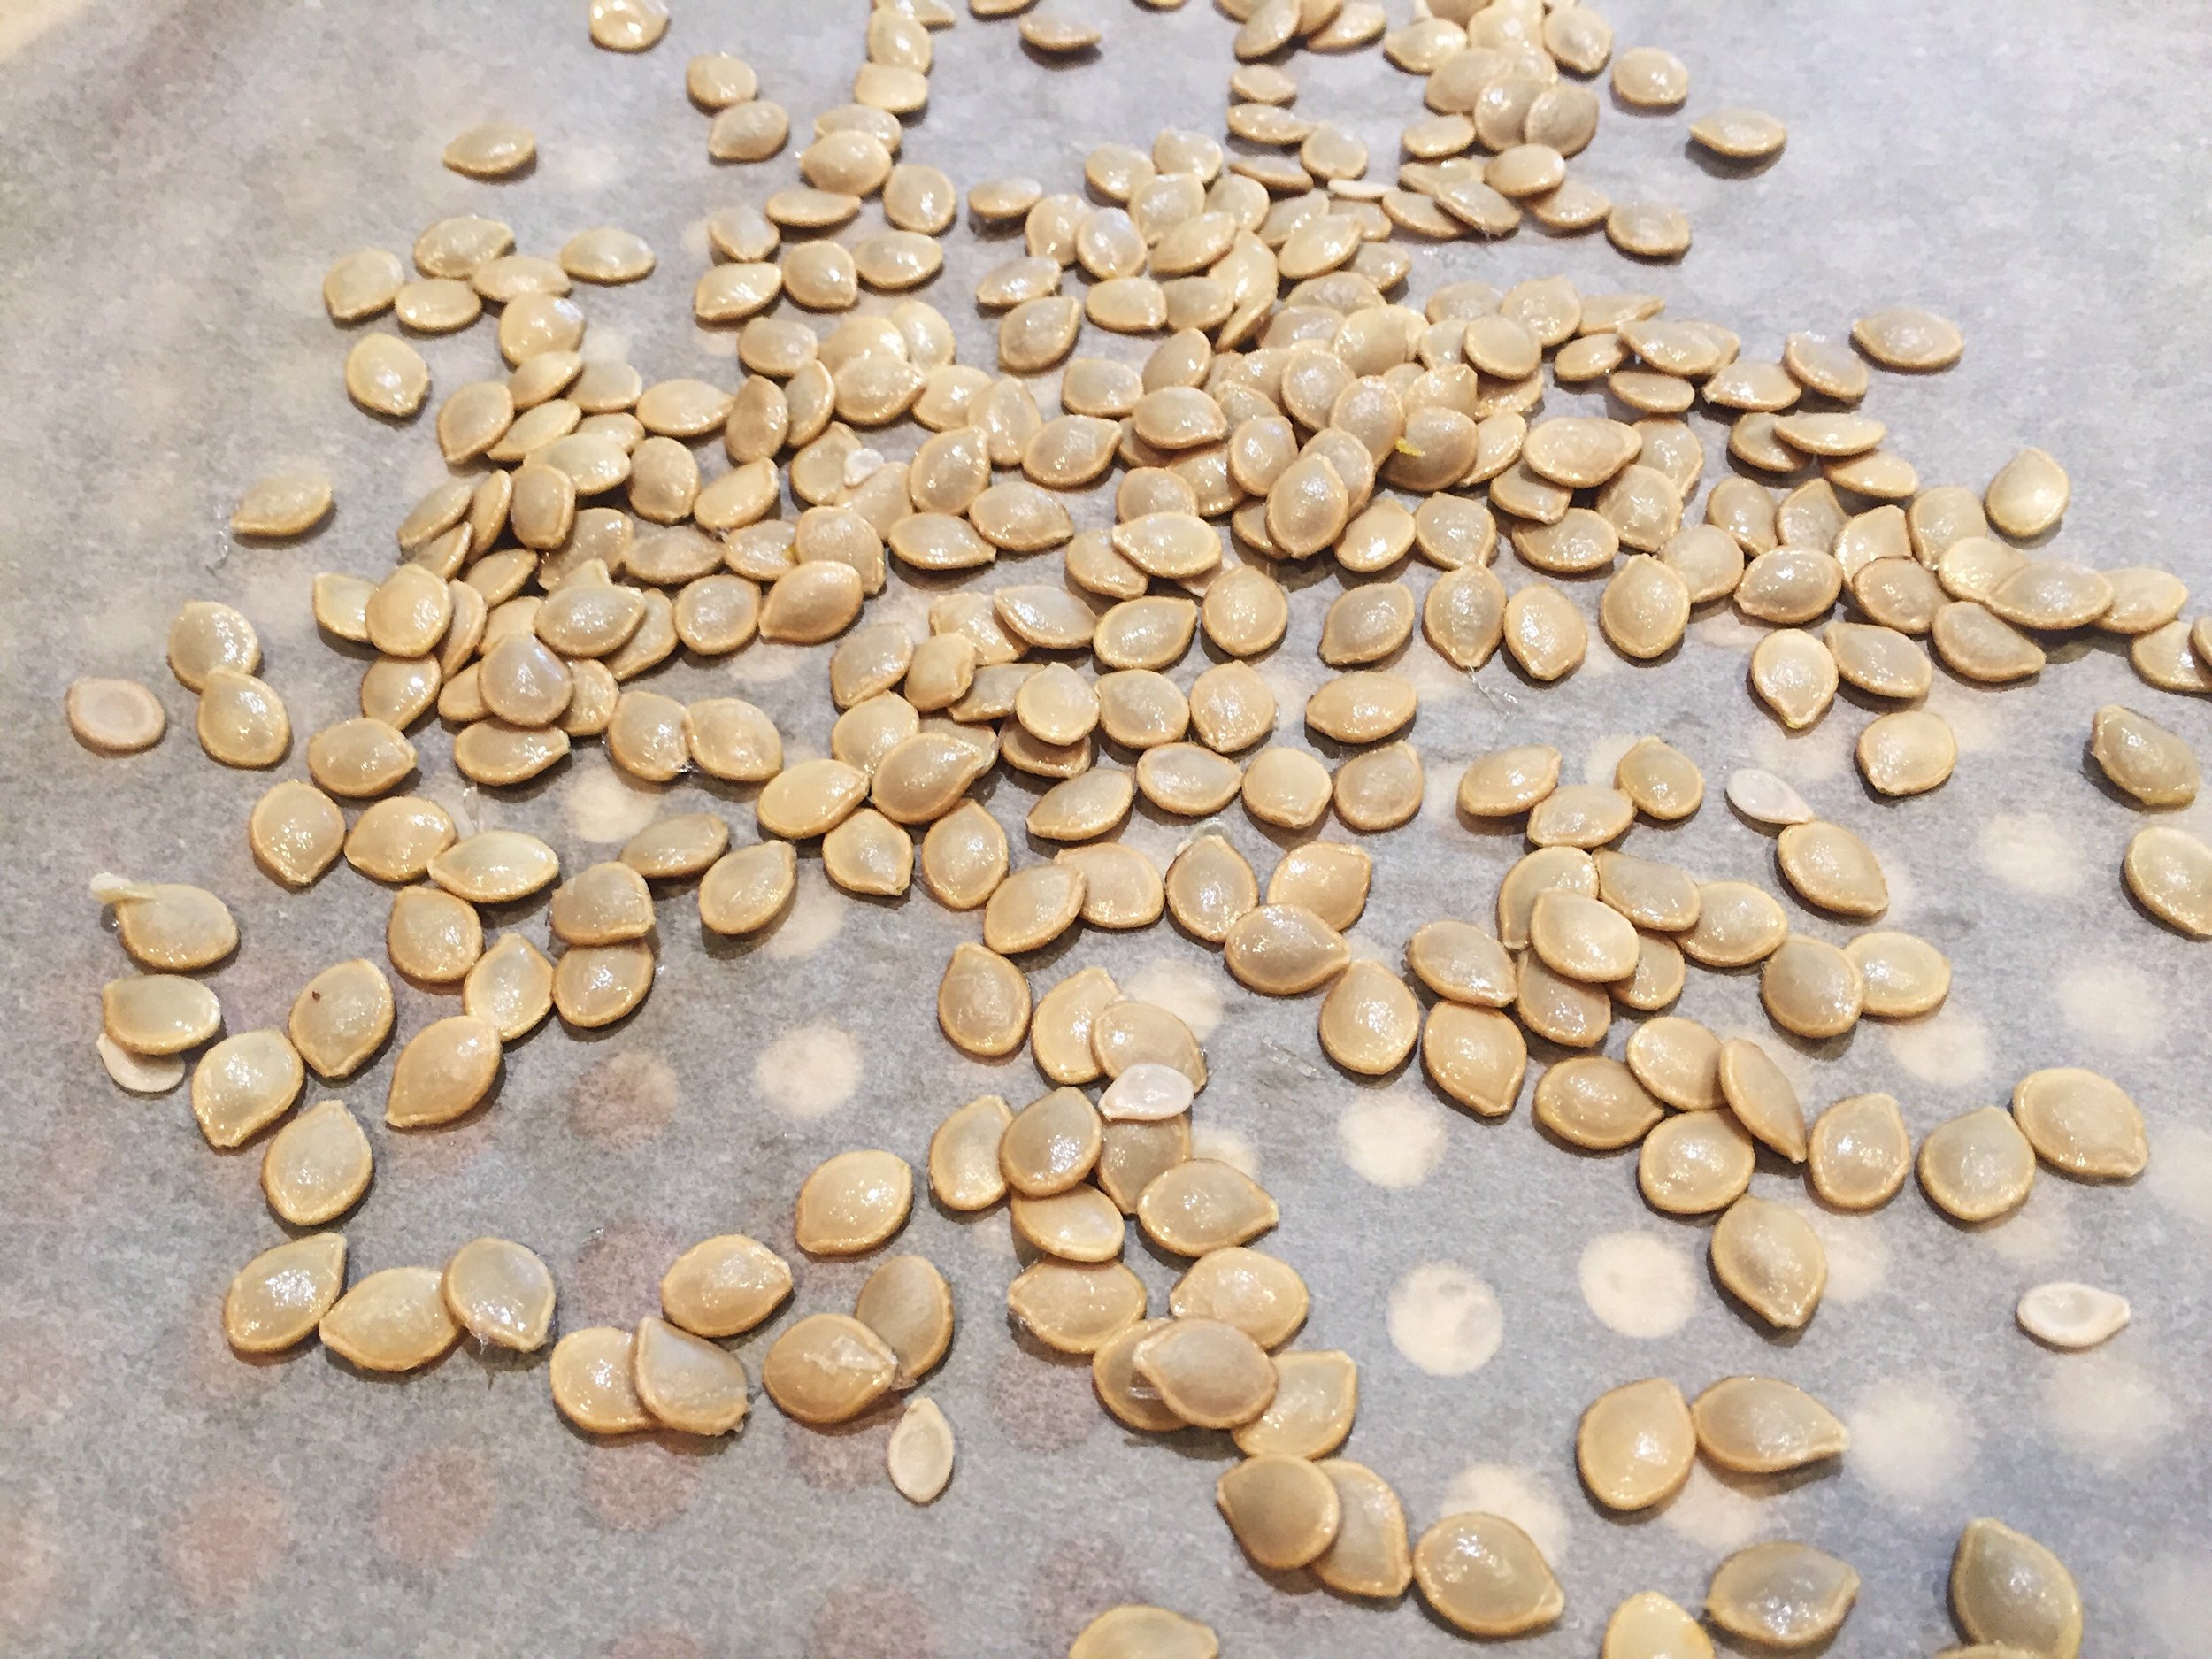
But the reason I am doing this post is because I wanted to share my #zerowaste tip for the squash. I think roasted pumpkin seeds are not a surprise. I never did at home and today I took my chances. I did my homework and found this recipe. A-MA-ZING!

Here are some pictures of the recipe process. Guys, you should TOTALLY do this at home!

Delicata squash roasted seeds: yummyness!

Delicata squash roasted seeds: yummyness!

 1: Soak the seeds in water and rub them a bit to remove squash.

1: Soak the seeds in water and rub them a bit to remove squash.

 2: Separate clean seeds in another bowl.

2: Separate clean seeds in another bowl.

 3: Place seeds in a large pan with cold water. Bring it to simmer for a few minutes. Rinse and repeat if necessary (until all the squash if off the seed).

3: Place seeds in a large pan with cold water. Bring it to simmer for a few minutes. Rinse and repeat if necessary (until all the squash if off the seed).

 4: Place seeds in a tray with parchmeant paper and spray a little olive oil and salt.

4: Place seeds in a tray with parchmeant paper and spray a little olive oil and salt.

 5: Roast in the oven at 325F (160˚ celsius) for about 10 minutes or until golden.

5: Roast in the oven at 325F (160˚ celsius) for about 10 minutes or until golden.

 6: Enjoy the seeds! 

6: Enjoy the seeds! 

tags: zero waste food, roasted, healthy, food, roasted squash seeds
categories: Zero Waste
Monday 10.09.17
Posted by Camila Rinaldi
 

Cleaning the Fridge - part "I don't even know anymore"

I have (maybe had by this point) a pretty stock up freezer right now. I've been trying to consume everything in there because I will need the space soon and because I realized that I have so much food in there. Including some containers that I've been missing as well.

Yesterday I found some Chicken Curry Meatballs hidden on the bottom of the freezer and decided to use them for lunch today. Also I had some shiitake mushrooms and a bit of coconut milk. You can see where I am going, right? During the weekend I did some tabbouleh and had bulgur ready to be used. I know that I am mixing Asian with Middle Eastern here, but what's the fun of cooking if you can't experiment, right? 

Yes, I am crazy for cilantro.

Yes, I am crazy for cilantro.

For the chicken meatballs: they were already done, I had to defrost it first. Then I did let them get golden in olive oil. After this I add the sliced mushrooms and garlic. Then it came the coconut milk, red pepper (cayenne), splash of lime juice, fish sauce and salt to season. A bit (a lot actually) of cilantro. And that was it.

I decided to stir fry the bulgur a little. Never did this way. I have no regrets! In a pan I added olive oil, red onion and garlic. Then the bulgur, stir fry it a bit and it's read in less than 5 minutes.

The whole meal took me about 15 minutes to prepare - from chopping until finished.

Don't love when you get the most of your fridge and do some amazing creation? This was DELICIOUS! Also I feel so fitness eating healthy food that doesn't taste bland or bad.

Monday 09.11.17
Posted by Camila Rinaldi
 
Newer / Older

Powered by Squarespace.